Wednesday, January 26, 2022

Crafty Canvases - Easy DIY Art


Here's an easy way to make art with canvases... no artistic skill required! You can have the art say whatever you want, and you can size it to suit your needs. You will need:

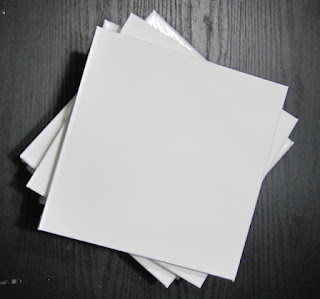
Canvases. Inexpensive canvases in various sizes are available at Michael's, other arts and crafts stores, and even Dollar Tree. I used six 10" x 10" canvases to cover a large wall area of six feet.


Letters. Now that decorating with letters is no longer a trend, people are donating letters to thrift stores, and craft stores are putting letters on clearance sales. Smaller posterboard letters are also available, or you can cut letters from scrapbook paper. I purchased wood and chipboard letters at thrift stores and at JoAnn for about $1 each.


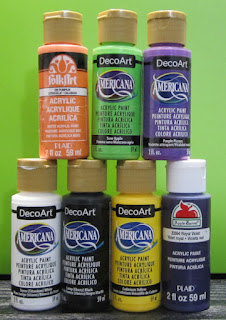
Acrylic craft paints. I used Halloween colors because I planned to hang the canvases in my Halloween theme workroom.


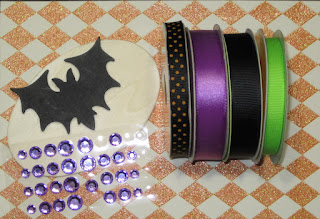
Decorative items to add to the canvases and/or letters. I used wood shapes, adhesive gems, scrapbook paper, and stickers.

Ribbon for hanging the canvases.


You'll also need thumbtacks and basic craft supplies such as scissors, paint brushes, and glue.

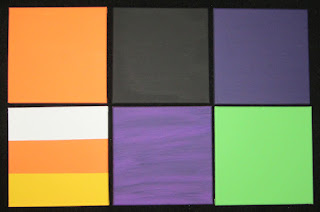
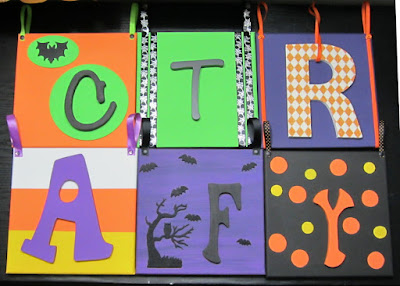
To begin, paint your canvases. Don't forget to paint the sides! I painted four canvases in solid colors, one in two shades of purple, and one in candy corn colors (using painter's tape to make straight lines).


Paint, decoupage, or otherwise decorate your letters. I painted most of my letters a solid color. I decoupaged scrapbook paper onto the "R."

When all the paint is dry, glue the letters to the canvases and add other decoration. (If you have a heavy letter, such as my chipboard "R," you may want to hang it in front of the canvas instead of trying to glue it directly to the canvas.) My decorations included painted wood shapes, ribbon, 3D stickers of bats and a spooky tree, and polka dots painted with round sponge spouncers.

Add ribbon for hanging the canvases. If you will be hanging them on a bar like I did, use a loop of ribbon from the back to the front on the canvas. To hang directly on the wall, attach the ribbon from side to side. Secure ribbon with thumbtacks pressed into the wood frame of the canvas. 


Hang your completed canvases. I used a curtain rod hung on decorative hooks.


Feel crafty! :D


Thursday, October 1, 2020

IKEA Moppe Makeover

IKEA Moppe made over with Halloween papers. The drawers are separate, removable boxes with a finger cutout which can be turned to the front or back. Using the plain side as the front, I decoupaged the drawers and added label holder handles. I painted the exterior with black craft paint. Done!


DIY Paint Brush and Pen Holders

Super easy DIY! I upcycled drink mix containers into paint brush holders by simply wrapping them with paper. 

The containers are just the right height for paint brushes. For shorter pens and swabs, I cut a piece of sponge to put in the bottom of the container.


Thursday, May 28, 2020

More Repurposed Kitchen Cabinets

More repurposed kitchen cabinets! I used wall cabinets this time. Floor cabinets would have been too tall and too deep for the space. The shorter and shallower wall cabinets fit perfectly under the window on either side of the floor vent.

I painted the cabinets in black and Halloweeny lime green. At first, I thought the green was too loud and intense.

But filling the cabinets with cans, jars, and painting supplies obscured the color a bit. Now it's calling out rather than shrieking. :)

Two lessons learned from this project:
1. Wall cabinets need not be hung on a wall.
2. A color (or pattern) that seems too intense when the cabinet is empty may be just right when the cabinet is full.

Wednesday, April 29, 2020

Repurposed Kitchen Cabinets

Two of my old kitchen cabinets have been repurposed in my workroom.

Just for fun, I painted them in a Halloween-inspired palette of black, orange, purple and green.


I added drawer liners made from a vinyl tablecloth.


Wednesday, April 15, 2020

DIY Shelf from a Repurposed Drawer


After treating myself to new kitchen cabinets, I am repurposing the old cabinets. They're poor quality and quite worn, but most of them are serviceable for my workroom and garage. More on that later. :)

One base cabinet was in such bad shape that it essentially fell apart when I moved it. (I can't believe it managed to support the weight of a countertop for 45 years!) The drawer was the only salvageable part.

I decided to turn it into a shelf to store my craft paints. After measuring the paints and the drawer, I determined how far apart to space the individual shelves.

I made shelf supports with small slices of 1x3 boards and attached them with my power nailer. I placed 1x3 boards on the supports to create the shelves.

After primer and green paint, I added black and white striped wrapping paper and topped the shelves with black and white striped washi tape.

The end result is storage perfectly sized for my craft paints and other small supplies.


Monday, April 6, 2020

Kitchen Remodel: Quarantine Style

Thanks to the COVID-19 stay-at-home situation, my kitchen remodel has taken on a somewhat different style than originally planned.

Instead of standard granite countertops, I have a custom set of boards and plywood topped with shelf liner. Truly unique! No one else has countertops like mine.


My cabinets and drawers don't have pulls to open them. With this stay-closed feature, they are guaranteed to remain tidy. Well, more accurately, they're guaranteed to remain empty.


Instead of a stainless steel double-bowl sink, I have a plastic utility sink. With its slender legs and built-in scrub board, it's elegant enough for the finest basement or laundry room. It has a quick disconnect feature as well; one little bump to the sink, and the plastic drain assembly falls apart.


The sink provides cold water only. Hot water is at hand, though, thanks to the shiny kettle with an LED-illuminated on/off lever. It's very user-friendly; simply tilt, and hot water is dispensed through the spout. 

But wait! There's more! The kitchen has additional fabulous features...

Electric cooktop! It has high, medium and low heat settings, allowing me to burn, overcook, or give up on my food.


Pantry! It's ideally suited to the latest stay-at-home lifestyle, with ample storage for shelf-stable foods. Built-in wheel technology allows it to roll in not one, but two directions!


Dishwasher! It's very energy efficient, using no electricity at all. It has several settings, from a gentle wash with Swish and Rinse to a thorough scrubbing with I Hate Washing Dishes.